Performing a little preseason Optimist maintenance can help you avoid wasting beautiful days on the water at the boat club doing work.
How many times have you had a call from the yacht club or coach to discover your sailor’s Optimist is broken because of something that you could have fixed easily before the season? As a result, rather than enjoy a beautiful summer afternoon, you’re at the club doing boat work.
Although it’s impossible to foresee every breakdown, below is a short list of areas that should to be inspected during the season for wear. Moreover, this article will walk you through a basic inspection of all the areas along with links to common repairs.
Preseason Optimist maintenance — the deck collar and mast step
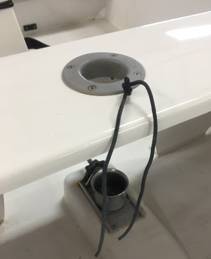
If a sailboat has a “heart”, this would be it. This area sees the highest loads and is also the hardest to fix if there is a catastrophic accident.
Deck collars are designed to fit snugly into a hole in the deck. Use your hand or a mast to see if the collar moves.
Likewise, inspect the deck for spider cracks in the gelcoat radiating from the fasteners. Then, if the collar is loose remove it and inspect the hole in the fiberglass.
If the hole is oblong then you will want to fill in the area. Simply tightening the fasteners will not work over a long period of time.
The mast step cup should be removed and cleaned every season. The main goal is to inspect the welds and the fasteners that hold the base to the hull floor.
If you have a hard time removing the cup, use a mast to leverage the cup forward as you turn the nut. In addition, you may have to use a pair of lock jaw pliers to help rotate the nut.
Then, after the cup is removed, check the fasteners with a screw driver. Do not use a drill. For directions on how to repair the mast collar, refer to this set of instructions found in our FAQ section.
https://optistuff.com/wp-content/uploads/2019/02/Mast-collar-step-repair-NEW.pdf
Preseason Optimist maintenance — dagger board, trunk and hiking straps
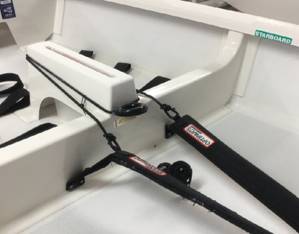
It’s very important that the trunk is periodically inspected to protect both the hull and dagger board.
Looking from the top down into the trunk, there should be bumpers at all four corners. After that, closely look at the bumpers, especially the bottom bumper, to make sure it is fully enacted.
The trailing edge of the dagger boards are quite sharp and can slice through the bumper, thereby leaving it ineffective.
McLaughlin uses shim tape on the top and bottom of the trunk to help minimize surface friction.
The tape on the top of the trunk is tan and the tape at the bottom is clear. You want to make sure it’s in good condition.
The shock cord around the trunk will wear out over time. Run your hands over the cord to see if any of the other sheathing comes off. If it does you will want to replace it.
The hiking straps are your connection to the boat, as a result, you want to make sure the canvas on the straps is in good connection.
Also check the adjustment line and hardware that connects the straps to the boat.
Here is a link to a video explaining how to replace the bumpers in the trunk:
Preseason Optimist maintenance — blades
The rudder and dagger board are often overlooked when people think about preseason Optimist maintenance, but they too need periodic inspection.
The neat thing about the rudder and dagger board is that the laminate is clear and you can see the inside core material.
For instance, some discoloration of the foam core is normal with age, but you do not want to see dark areas larger than a quarter. This may be signs of water intrusion.
https://optistuff.com/wp-content/uploads/2019/02/EpoxyBladeRepair.pdf
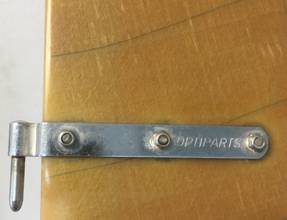
The hardware on the rudder can also fail. Consequently, the fasteners and welds on the pintles need to be inspected to make sure they are snug and do not show any signs of fatigue.
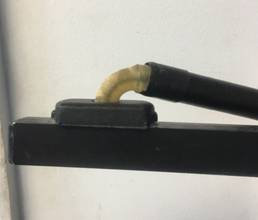
The rubber thing that connects the tiller and tiller extension call the universal joint is certainly important.
Ensure you do not see any cracks and the joint itself does not look dry and brittle.
Preseason Optimist maintenance — spars and lines
Although Optimist spars are designed to last long as or longer than the boat itself, they similarly need a little attention from time to time.
In the off season, a quick coat of McLube will go a long way from keeping the saltwater from eroding the metal. It also helps sail ties slide!
Take a close look at the end fittings of each spar. They should all be firmly attached.
If you can rotate an end fitting then it needs to be removed and glued back in place.
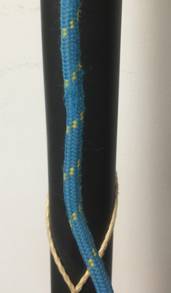
The cleats on the Optimist spars are clam cleats. They are very tough on cordage. You want to check the sheath of the lies for wear.
Pay close attention to when the lines typically go through the cleat. There may only be a few inches of wear on a line, but it’s probably where the line is supposed to go through the cleat.
If the line is in otherwise good shape you do not have to replace it. For instance, you can flip the line around or shorten it so that it enters the cleat at a different place.
Every sailor wants to have an edge when it comes time to compete, and now you know how to get it.